I love crafts, especially costume crafts. For as long as I can remember, Halloween has been—in the words of John Zmirak—my high holy day. In pursuit of the perfect Halloween costume, young Catherine ruined a lot of paper, cardboard, and string.
While no expert, I’ve come a long way since the days when I made a Snow Queen tiara out of tinfoil. But while grown-up me has a (small) costume budget and has moved on to full leather armor and thermoplastic builds, I still love a good, cheap, simple costume craft that you can make with stuff you find around the house. With that in mind, I’ve decided to share some of my costume and craft builds here!
Today, I’ll be showing you how I built a very simple Tudor gable hood.
This project grew out of a conversation with the history blogger Sonetka, AKA BoleynBooks on Twitter. (Definitely check her out. She writes incredible, funny essays and book reviews about Tudor history.) One of her children wanted to be Catherine of Aragon for Halloween, but the tragic queen’s gable hood—that boxy headdress you see on Tudor portraits and playing card pictures—was looking to be a pain in the butt for her to make. I had time on my hands, and I like a cheap costuming challenge.

Pictured: This should be easy to make, right?
My goal for this project was not to create something historically accurate. Instead, this had to be an OK-looking costume piece that could be made at home, cheap, and without much in the way of specialized tools or skills. Aside from the fabric, you can buy everything you need for this at a Walgreens or dollar store. The fabric I ended up using was all messy, frayed odds and ends from my scrap box.
This ended up being a surprisingly fun craft, too. It took me about two hours and required no sewing at all. You can use this as part of a history-inspired costume or modify the recipe to build a larger or more original headdress as you see fit.
The materials provided below are for a basic three-color gable hood. I used white lining, red front lappets and black back lappets, with some plain mass-produced gilt ribbon trim to add a little shine.
Please excuse the low-quality photos; my phone is ancient, and this whole thing was put together quickly in one afternoon.
Materials
- A small- to medium-sized cardboard box, opened up and laid flat
- A second square of cardboard about twelve inches by twelve
- White cotton fabric (or an old bedsheet) for the lining and base layer
- Black satin or velveteen (or felt if you’re in a hurry) for the back “box” and the back lappets
- About two yards of red fabric for the front lappets
- Miscellaneous trim, fake gold, fake gems, and scrap fabric (if you so desire)
- Scissors
- Hot glue
- Packing tape
Steps
1. Lay out your cardboard width-wise and find your center line. When you’re looking at it, it should be wider than it is tall, and the center line should go up the middle of the cardboard. I used a Priority Mail Medium Flat Rate box: fully unfolded, it gave me a length of about 27” by 14”, which ended up being more than enough.
2. When creating the basic structure of the hood, you’re folding a long rectangle of cardboard into four equal sections. You’re essentially making a house shape or a pentagon, with the fifth side being the open bottom of the hood.
3. Choose which side you want to be the front of the hood. With your scissors, cut about an inch deep into each of the three main folds. Now fold in each side of the hood in an inch-long strip, overlapping the folded-down edges slightly. These will form the front part that frames the face. Make sure you tape these down securely. You want a bit of overlap in them—this should be a pentagon shape, not a perfect house shape, and having those securely taped overlaps will help hold the shape.
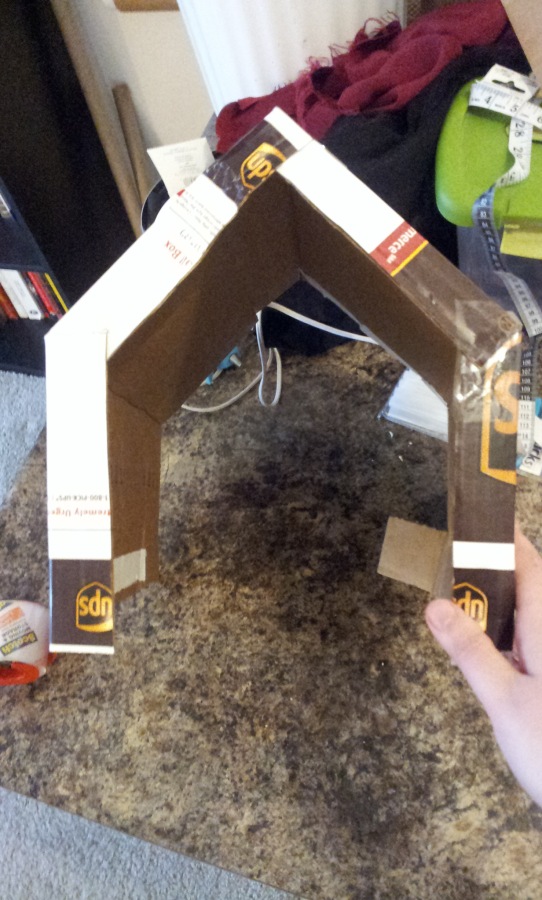
Figure 1: A house for your head.
4. Put it on and figure out how deep you want your hood to go. We’ll be adding an extra piece onto the back, so a little shallower is better. Right now, you should have way more space than you need in the back, so it looks like you’re wearing a house on your head. That’s going to change.
5. On the other side of the hood, cut much deeper slits into each fold. This will enable you to fold the back half of the hood in on itself, like you’re closing a cardboard box. Pay close attention to how much space you have in the back: it should be lightly touching the back of your head but not too tight. Your face will protrude slightly, not be shadowed by the hood. Err on the side of too much space in the back; if you end up with an over-large hood, you can improve the fit by taping or gluing padding into it.
Figure 2: Cutting slits into the back of the “house” so the back flaps can be folded and taped down. And no, that’s not a phone number on the tag, so don’t worry.
6. Tape the back flaps securely in place. You should now have a five-sided structure open at the bottom, with the back end closed and the front end opened with overlapping folds. This is the basic structure of your gable hood.
7. While you’re at it, take that other square of cardboard and fold a quick open box shape. You want each of the four sides to be about one and a half inches tall, with the bottom of the box about ten by ten. It should be a little smaller than the backside of your gable hood. When this box is in place, it’ll look like a diamond aligned with the top point of the pentagon.
8. Now it’s time to start using fabric. Cover your hood, inside and out, with the white fabric. I used an old bedsheet for mine. This sounds a lot more complex than it is; a lot of it is just folding and tucking. Use generous amounts of hot glue to hold it all down.
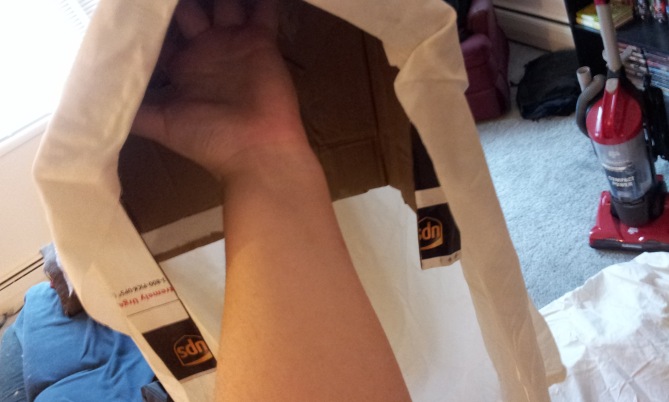
Figure 3: Folding and gluing the first layer of fabric into place.

Figure 4: That’s a bit more like it! Keep going until the entire thing is lined with white.
9. Take the smaller box and cover its back and sides with black fabric. To make it look like the box itself is actually made of folded or stiffened fabric, cut large triangles and glue them into place with the edges curled under.
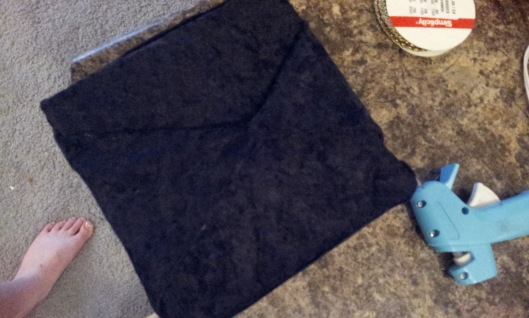
Figure 5: Faux folds.
10. Cut and glue your black lappets. These are just two long strips of fabric that will hang down your back. You can sew long tubes or strips of fabric for your lappets. Glue one end of each lappet into place inside the black box; these will be at the bottom of the back assembly, so make sure they’re close to each other as if they’re hanging down.
11. Sew (or glue) together a long strip of upholstery fabric, making sure any raw edges are hidden. These will be your fancy front lappets. In one portrait of Catherine of Aragon, she has what looks like red-and-gold embroidered fabric for this, so I used red in my sample hood. (Note: If you’re trying to go for a more portrait-accurate look, these should actually be quite long so that their ends can be pinned up atop the hood’s peak.)
12. Attach your red fabric to the hood. To do this, find the center line of your fabric and glue its underside to the peak of your gable hood. It should sit about half an inch back from the very edge; this shows off the white fabric underneath.
13. Now you can attach the box to the back of your hood. Slather the edges of the box generously with hot glue and press down firmly. The topmost point (opposite the black lappets) should line up with the top point of your hood.
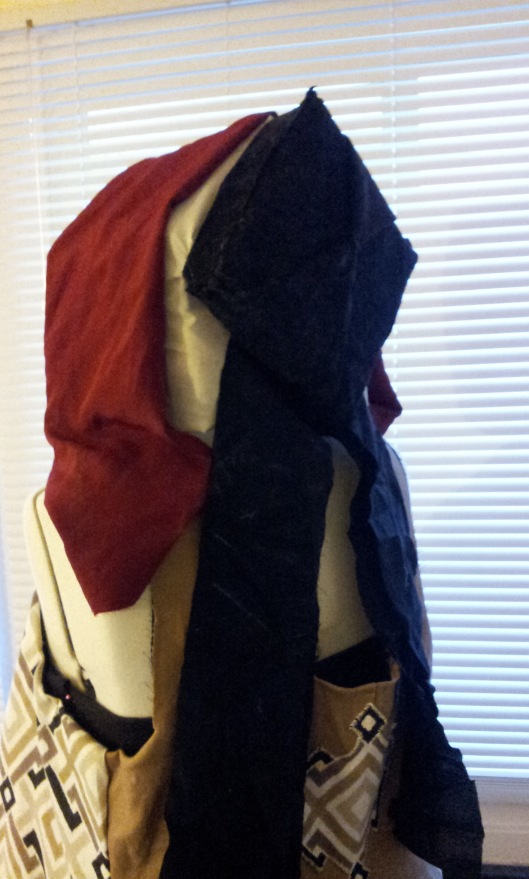
Figure 6: Lappets, front and back, with non-matching WIP.
14. The best part. Decorating! I used strips of gold trim to jazz up the front flaps of my hood, but a real queen would probably have some jewels on there. You can also glue additional decorative fabric strips that show under the front flaps—see the Catherine of Aragon portrait above, where she has striped fabric.
15. You’re done! Put on a black dress, wear every necklace you can find and refuse to surrender your throne and your daughter’s title to some upstart hussy.

Figure 7: Two hours and no sewing later.

The black box looks remarkably like an old-fashioned academic headdress – it would go great with a scholar’s gown. In fact it would look a lot better than the mortarboard, which has got to be the stupidest headgear ever invent.
As one whose sewing skills top out at reattaching a button – I salute your costuming skills.
LikeLike